在上海折腾了几年,好不容易,终于有了一个属于自己的小房子。对于喜闻佛法的我来说,自然希望能够在家里留一小片清净之地。佛龛那是必备啊。
After a few years in Shanghai, finally I have a small house of my own. Personally, I would like to learn the teachings of Buddhism, and because of it, I want to keep at home a small piece of pure land. The Fokan is essential.
作为一个深受建筑学浸(du)染(hai)的建筑师,自然不能接受到淘宝买一个很正常的佛龛,(其实要点在于看得上的买不起)。再加上自己的那么一丁点建筑师情节,这佛龛必须得自己设计,自己制作。于是在新房子装修期间,我也开始动手准备打造自己的新佛龛,一个以极简规则演化丰富效果的设计。
As an architect, I do not want just a normal one from Taobao. (In fact, the thing, is that I can not find the one which I am satisfied with.) As an architect, in this situation, this Fokan should be personalized and designed by myself. So during the renovation of my new house, I began the design of my Fokan, minimalist and simple design with rich details.
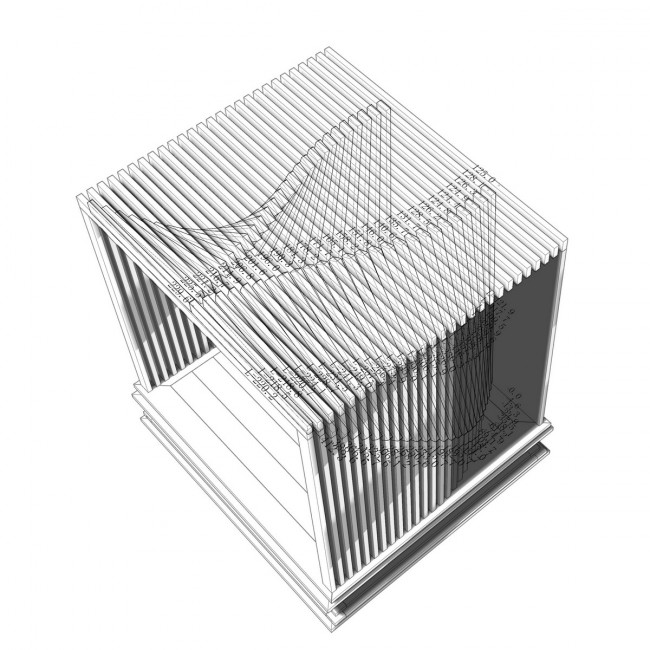
几经折腾后,找到了一个非常简单的规则设定方法,在近乎立方体的空间中,加入一个构造层次:在横向杆件和竖向杆件之间,加入一根斜向杆件。
After the initial steps of the design, a very simple design rule was found, adding the structural elements to the simplicity of the cube: adding a diagonal line to the horizontal plane and also to the vertical plane of the cube.
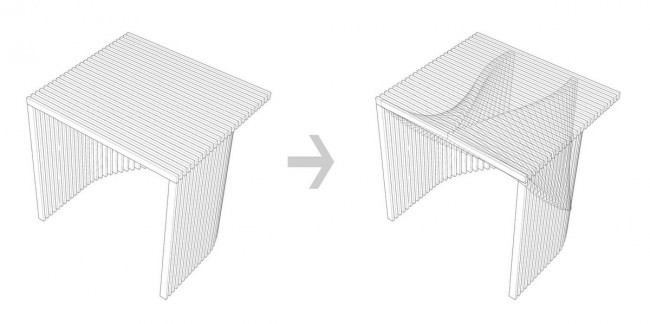
此杆件在横向上的定位由中间向两边以conic graph控制渐次变化,在竖向上的定位由上至下线性渐次变化。从而产生一种由外侧的横向空间,逐渐向内转换最终成为竖向空间的效果。
The diagonal of the horizontal superior plane gradually changes from the middle side until the opposite corners of the cube. In the vertical lateral planes, the diagonals go from the back lower corners to the upper front corner. The combination and shape created by both diagonal change and reinforce de feeling of the interior vertical space.
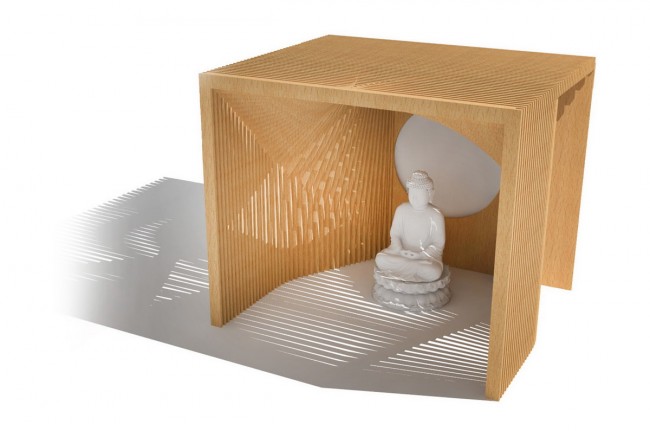
同时由于这一层次的加入,让光影效果显得异常丰富。下图是用V-Ray进行渲染,以测试所可能产生的光影效果。
Due to the addition of this new shape and framing structure, the light and shade effects are very rich. The figure bellow is a rendering using V-Ray to test the possible effects of light and shade.
个人始终认为,计算机屏幕上显示的模型,和实体模型之间,总有些感受上的差异,于是用3D打印机打了一个1:5的模型。
I always thought that a virtual model displayed on the computer screen feels slightly different from a physical model, that is why I used the 3D printer to make a 1:5 scale real model.
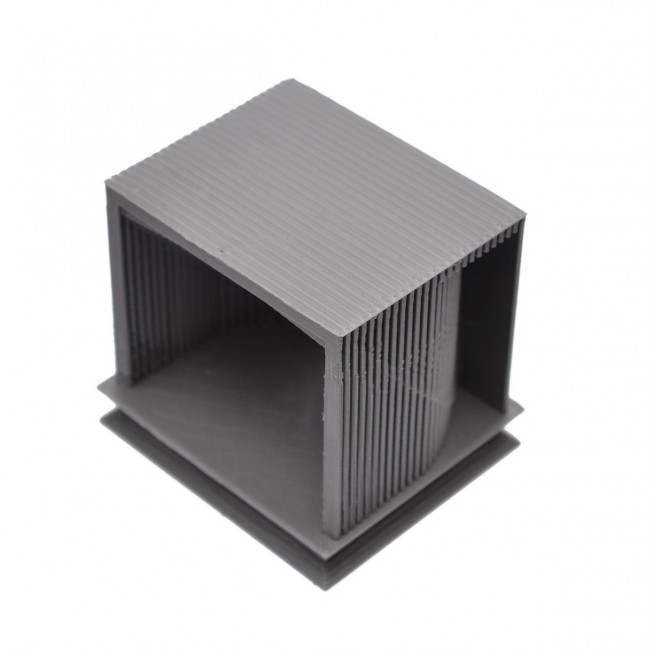
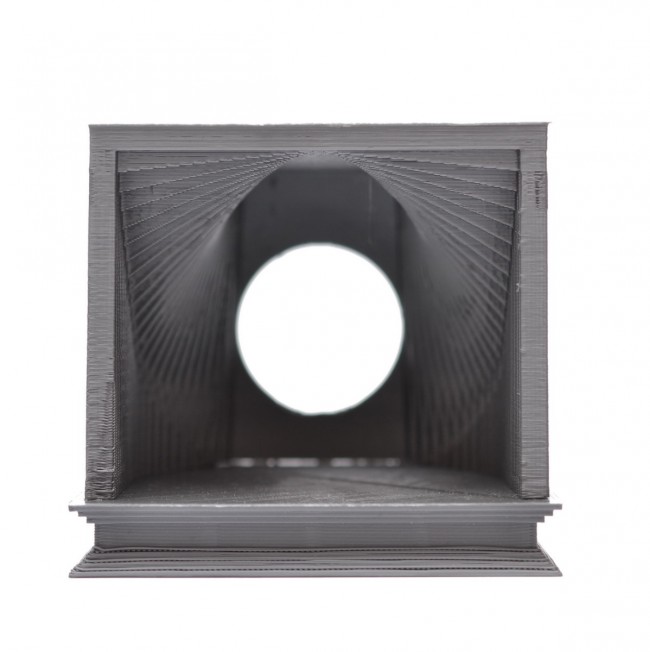
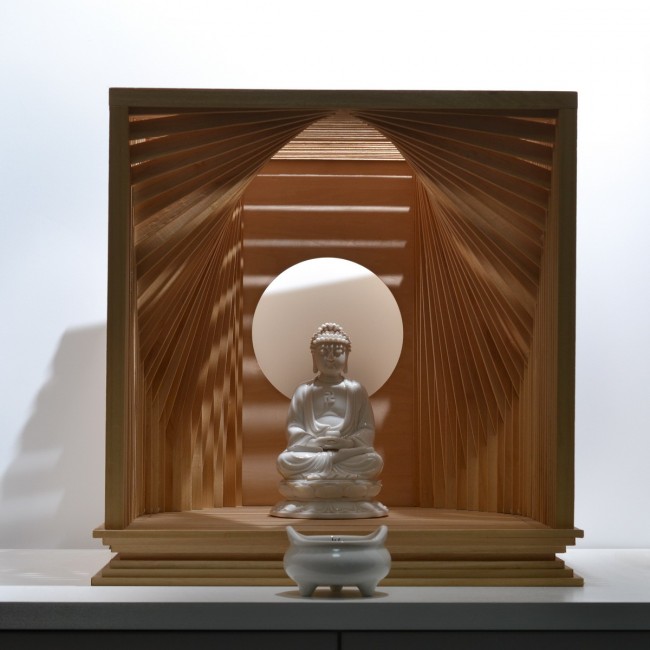
这个模型从正面看上去,确实达到了自己所预想的效果,用内人的话说,颇有佛光普照之感。
This model seen from the front, is exactly what I expected, as my wife said, quite foguangpuzhao feeling.
效果确定后,着手准备动手制造了。因为规则设定的很简单,因此施工图也很简单,直接Grasshopper的Text Tag标注斜杆的杆件长度以及首末点定位即可。
The model was ready to be assembled and manufactured after the pieces were printed. Because it was designed following a very simple rules, so the construction is very simple too, direct Grasshopper Text Tags were marked, and the diagonal rod length and end point positions as well.
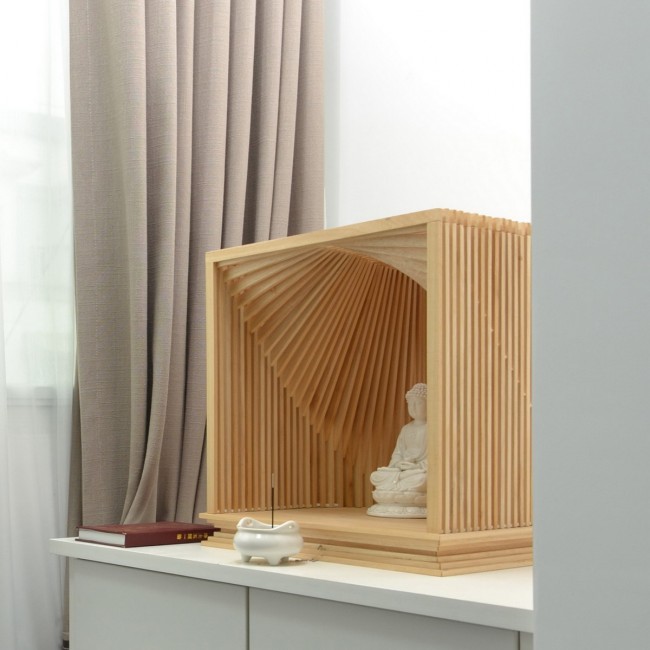
最终完成效果:
Final Result: